Yep… this was a long long way to complete the course:
56 total hours 569 lectures
But!.. I’m pretty sure I’ve got a ton of useful things from it! I can recommend this one!

Yep… this was a long long way to complete the course:
56 total hours 569 lectures
But!.. I’m pretty sure I’ve got a ton of useful things from it! I can recommend this one!

You cannot just… complete a course on Udemy you say? I say that I can! 32hr course completed!

Just took this exam today, it was relatively simple. I would say that MS Azure Fundamentals is a bit harder. But anyways:

And… this is a reminder to myself that time flies super fast! It feels like I posted about starting the 30 days of Postman challenge just yesterday and now I’m posting that it’s completed. That was a fast and interesting journey. I’m going to be missing those daily challenges.
Started this one recently. Looks pretty fun! Completed the day 6 today. Just to have my skills in check. Overall pretty interesting experience, would recommend this one to a friend 🙂
If you want to start your own challenge – just click below:
https://blog.postman.com/introducing-30-days-of-postman-coding-challenge/
This time our focus is to install the latest OpenJDK in a Windows system. Let’s start with the download first.
Current OpenJDK GA release can be found here: https://jdk.java.net/16/ the latest version now is JDK 16.0.1 Now let’s download the latest version that is provided as a .zip archive for Windows / x64.
Here’s a direct download link: https://download.java.net/java/GA/jdk16.0.1/7147401fd7354114ac51ef3e1328291f/9/GPL/openjdk-16.0.1_windows-x64_bin.zip
Now we’ll need to unzip the file into a target folder. I prefer to put Java into a folder like C:\Program Files\Java but theoretically it can be located anywhere on your drive. Be sure to use Admin user (or have an access to the Admin user credentials) to extract zip archive into C:\Program Files folder.
My unzipped folder looks like this:
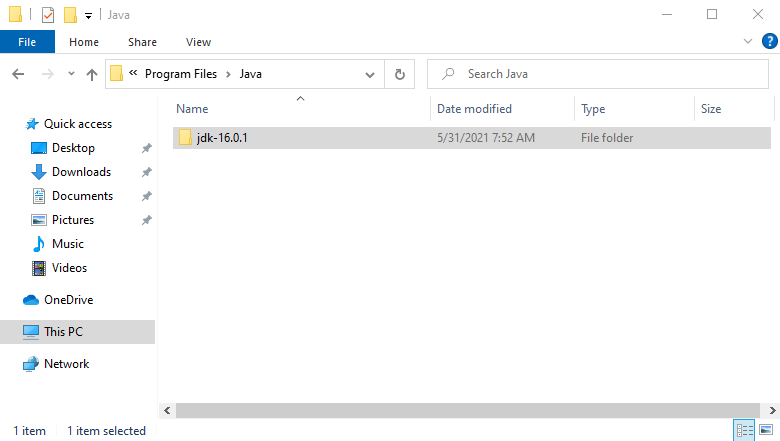
Our next task is to add our Java to the Windows PATH variable so we can execute it across all of our System.
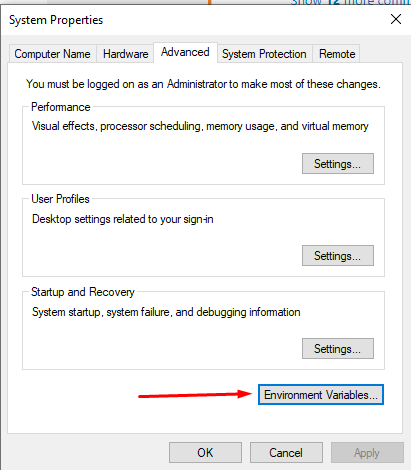
Press Win key and start typing: “Environment Variables” you should see something like this:
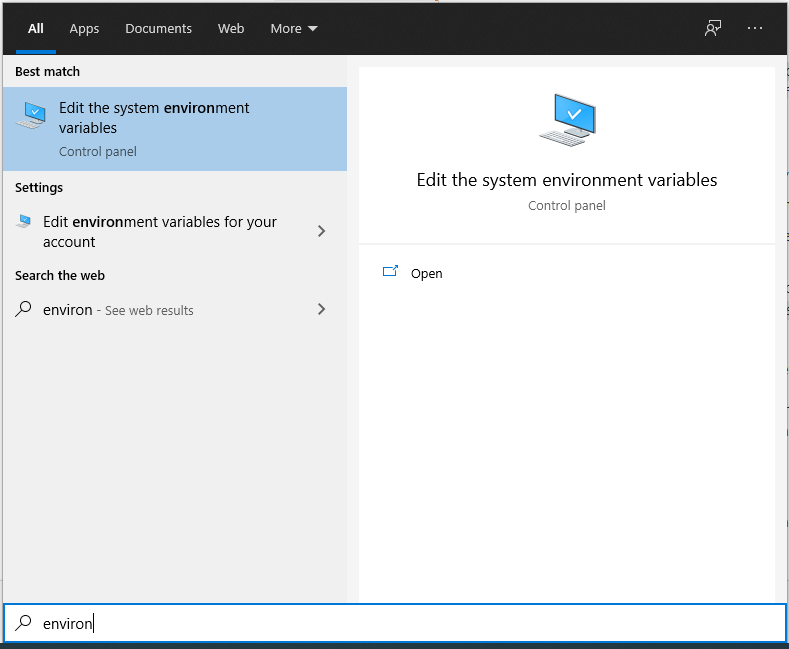
Open Edit the environment variables link and in the Advanced Tab select Environment Variables
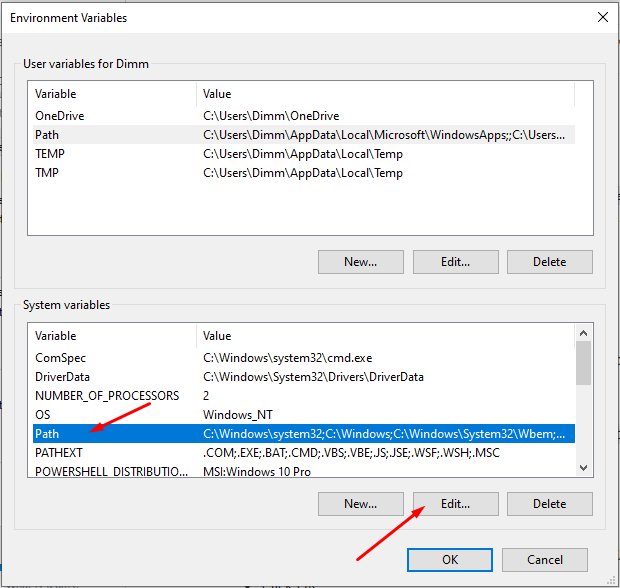
Now in the .Environment Variables select Path from a list of System Variables and click Edit…
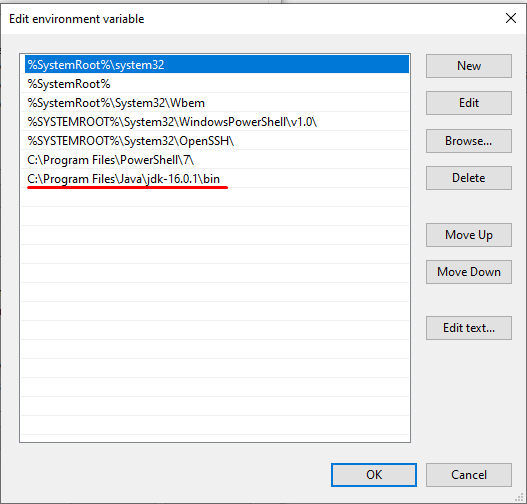
Add your folder path with Java installation to the list, be sure to use path with \bin folder in the end. In this example I have it like so:
C:\Program Files\Java\jdk-16.0.1\binWe should have something like this eventually:
Now close all the windows and let’s verify if we have added Java to the PATH variable correctly, start the Command Prompt and just type:
echo %PATH%Our output should have our Java installation location included, and may look like this:

We are done with this part, now we can verify that our Java installation is working properly, while in the command prompt type and execute:
C:\>java -version & javac -versionOur output is expected to be something like:
openjdk version "16.0.1" 2021-04-20
OpenJDK Runtime Environment (build 16.0.1+9-24)
OpenJDK 64-Bit Server VM (build 16.0.1+9-24, mixed mode, sharing)
javac 16.0.1
Was it simple? I think it was! Good job!
So, you are puzzled how to install JDK from tar.gz file in your Ubuntu system? In reality it’s pretty simple. Let’s start with the download first.
Open: https://jdk.java.net/16/ the latest version now is JDK 16.0.1 be careful and select proper architecture for your machine. For general x64 linux machines it’s named Linux / x64. Or you can just get it from the terminal like this:
user@ubuntu:~$ cd ~/Downloads
user@ubuntu:~$ wget https://download.java.net/java/GA/jdk16.0.1/7147401fd7354114ac51ef3e1328291f/9/GPL/openjdk-16.0.1_linux-x64_bin.tar.gz
Now you have your openjdk-16.0.1_linux-x64_bin.tar.gz in the Downloads folder the next step is to extract it to the /opt folder like so:
user@ubuntu:~$ sudo tar xvf ~/Downloads/openjdk-16.0.1_linux-x64_bin.tar.gz -C /optand let’s verify that we have all the files we are expecting in the /opt folder:
user@ubuntu:~$ ls -la /opt We should see something like:

So we are all good and now we can continue with the installation, let’s run:
user@ubuntu:~$ sudo update-alternatives --install /usr/bin/java java /opt/jdk-16.0.1/bin/java 1000and the same idea for Java Compiler:
user@ubuntu:~$ sudo update-alternatives --install /usr/bin/javac javac /opt/jdk-16.0.1/bin/javac 1000Now we have our JDK installed it’s time to make sure we are using the correct version. If you don’t have any other versions of Java installed you can safely skip this part. Otherwise let’s update the default JDK that our system will be using.
user@ubuntu:~$ sudo update-alternatives --config javaPossible output may look like this:
There are 2 choices for the alternative java (providing /usr/bin/java).

  Selection    Path                      Priority   Status
------------------------------------------------------------
* 0            /opt/jdk-17/bin/java       1001      auto mode
  1            /opt/jdk-16.0.1/bin/java   1000      manual mode
  2            /opt/jdk-17/bin/java       1001      manual mode

Press <enter> to keep the current choice[*], or type selection number:
Now we need to select the version we are planning to use – in my case I’ll need to input 1 and press Enter. And let’s just run this command one more time to see if we have changed the default JDK:
user@ubuntu:~$ sudo update-alternatives --config java
There are 2 choices for the alternative java (providing /usr/bin/java).

  Selection    Path                      Priority   Status
------------------------------------------------------------
  0            /opt/jdk-17/bin/java       1001      auto mode
* 1            /opt/jdk-16.0.1/bin/java   1000      manual mode
  2            /opt/jdk-17/bin/java       1001      manual mode

Press <enter> to keep the current choice[*], or type selection number:
Now repeat the drill for Java compiler:
user@ubuntu:~$ sudo update-alternatives --config javacSelect the version we have just installed:
There are 2 choices for the alternative javac (providing /usr/bin/javac).

  Selection    Path                       Priority   Status
------------------------------------------------------------
* 0            /opt/jdk-17/bin/javac       1001      auto mode
  1            /opt/jdk-16.0.1/bin/javac   1000      manual mode
  2            /opt/jdk-17/bin/javac       1001      manual mode

Press <enter> to keep the current choice[*], or type selection number:
And verify the result by running the same command:
user@ubuntu:~$ sudo update-alternatives --config javac
There are 2 choices for the alternative javac (providing /usr/bin/javac).

  Selection    Path                       Priority   Status
------------------------------------------------------------
  0            /opt/jdk-17/bin/javac       1001      auto mode
* 1            /opt/jdk-16.0.1/bin/javac   1000      manual mode
  2            /opt/jdk-17/bin/javac       1001      manual mode

Press <enter> to keep the current choice[*], or type selection number:
Alright! We are all good! Now it’s the time to verify that we are all good and our version is the one we expected:
user@ubuntu:~$ java -version && javac -versionOur output is expected to be something like:
openjdk version "16.0.1" 2021-04-20
OpenJDK Runtime Environment (build 16.0.1+9-24)
OpenJDK 64-Bit Server VM (build 16.0.1+9-24, mixed mode, sharing)
javac 16.0.1
Purrrfect! This is what we were looking for! Good job!
It’s been ~1.5 years since I decided to choose Java as my main programming language. I spent some long time considering what to choose… another candidate was Python… a much lighter and a whole different animal. Given what’s going on with TIOBE index nowadays I had some time to question my decision… Python is really in demand and Java is dropping. But there was something magical in Java, may be that it didn’t look as light and the challenge that it was putting in front of me? Definitely I started and dropped learning Java 2 or 3 times before. 🙂 So back to the point I’m on my journey to Oracle Certified Java Programmer achievement. The surprise from Oracle was that they decided to retire 1Z0-815 and 1Z0-816 exam and created an new one – 1Z0-819 that combined both… so basically they put me away from my goal to take 1Z0-815 in 2020. Because the knowledge of 1Z0-815 isn’t enough for 1Z0-819 I’m kindof stuck with learning the 1Z0-816 part now to have a complete knowledge for the new exam. But I needed something so I went and got certified as Java Certified Foundations Associate at least something to keep me going.
I must say that the body of knowledge for 1Z0-819 is huge… pretty much ~1500 pages which one needs to not only make sense of but be able to answer really tricky questions about. So on my way I have changed a lot of different approaches to learning that much. So I want to share my latest idea here and look at it later and revisit it and may be add something for the future me or a reader 🙂
1st go:
2nd go:
3d go:
4th go:
Repeat all of that for the next section of chapters.
Good luck and happy learning! Make that happen!
Are you guys looking for cheap developers? 🙂 Prepare to ask yourself many uncomfortable questions 🙂
This trend is really interesting these days, I’ve been bombarded by recruiters looking for SDET position candidates on a daily basis. I know, recruiters aren’t those who write job requirements. So this post would be more addressed to Hiring Managers. So who do you guys really want? Let’s look at skillsets(obv. incomplete, just for the sake of visualization):
Just think about this for a second. Let it sink down.
What is very interesting is that most of SDET job descriptions represent a developer background. Not just any, a strong developer background with 3-5 years of experience.
Let’s look at simple life scenario of SDET at work:
– Hey, {Name} can you test this?
– Sure, here’s a bug.
– Can you look in the code and make sense what’s wrong?
– Sure, here’s the problem in the code.
– Can you fix that yourself?
– Yes, I can fix that and I’ll test the fix after.
Ask yourself these questions now:
Here are some more questions to think about:
Who can actually make a good SDET?
So these are those who are you looking for to fill your SDET positions. Plain and simple.
Same article on LinkedIn